
Building Your Own Kitchen: A DIY Guide for Small Spaces
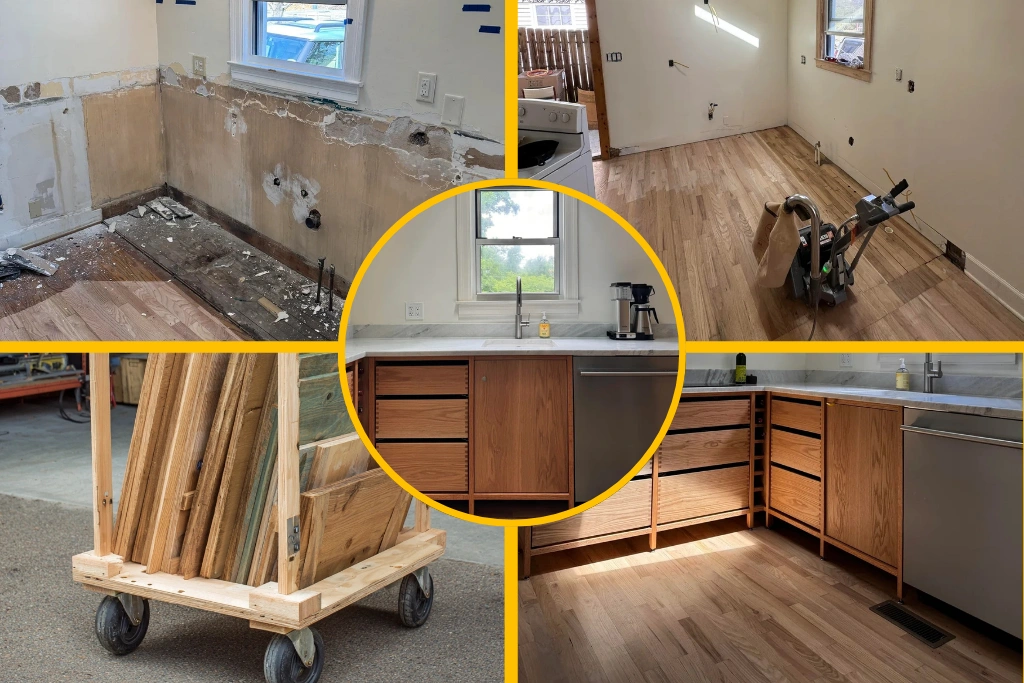
Have you ever looked around your house and thought, “I want to change that!” Maybe you want to paint your room a cool color or build a giant pillow fort that never falls. Well, that’s exactly how I felt about my kitchen.
I live in a small house, about 800 square feet. If you imagine 800 square-foot tiles, that’s my entire house! It’s cozy, but the old kitchen was… not great. It was crowded and had little space. I decided it was time for an upgrade, and I wanted to do it all myself!
This blog post is all about how I designed and built a brand-new, solid red oak kitchen from scratch. It’s a story about big ideas, a few problems, and how I learned to make a kitchen that’s just right. I hope it inspires you to think about how you can build something amazing!
The Big Kitchen Story:
Our Idea: The Red Oak Kitchen
I had a dream: I wanted beautiful, strong wood cabinets. Not the kind made of flimsy sawdust and glue, but real wood that smells like a forest. Specifically, red oak. I wanted a kitchen that felt warm and welcoming, built for baking cookies and, of course, enjoying them, too.
The first step was designing it. I spent a lot of time with graph paper and pencils. I measured my kitchen area very carefully. Every inch mattered!
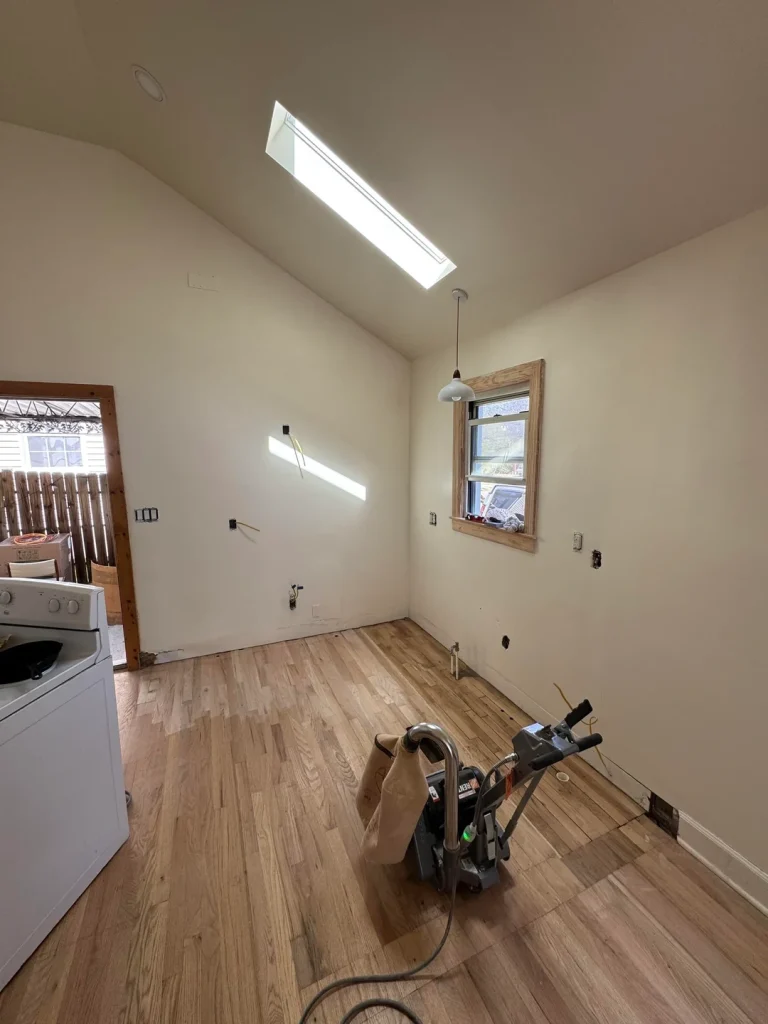
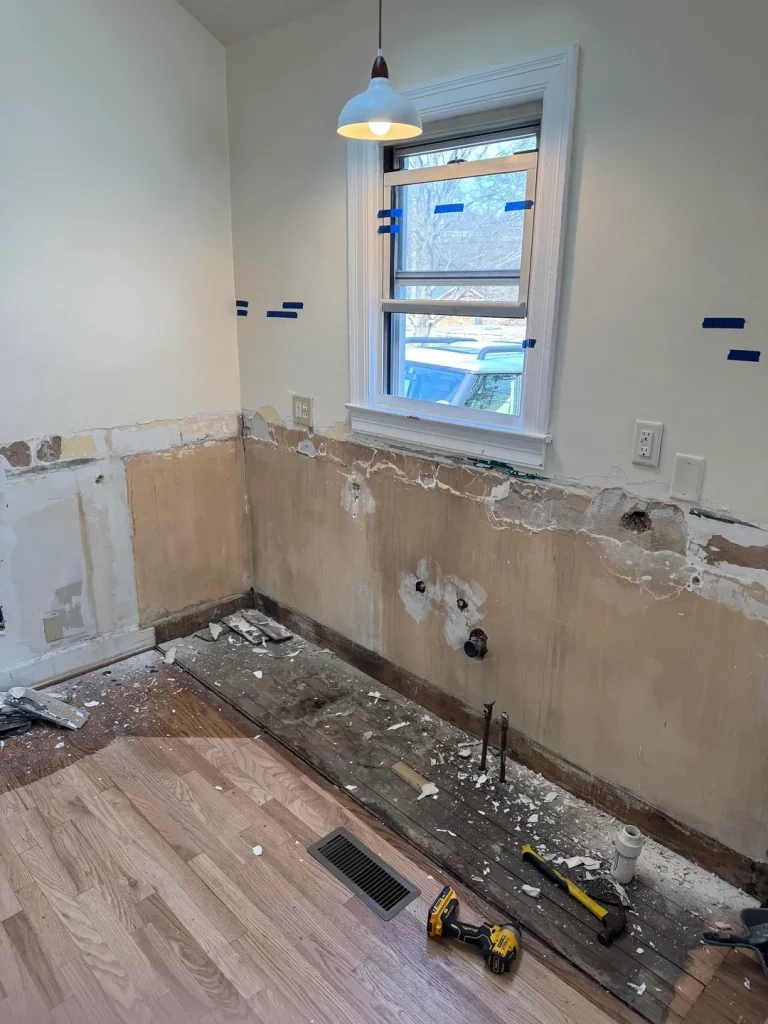
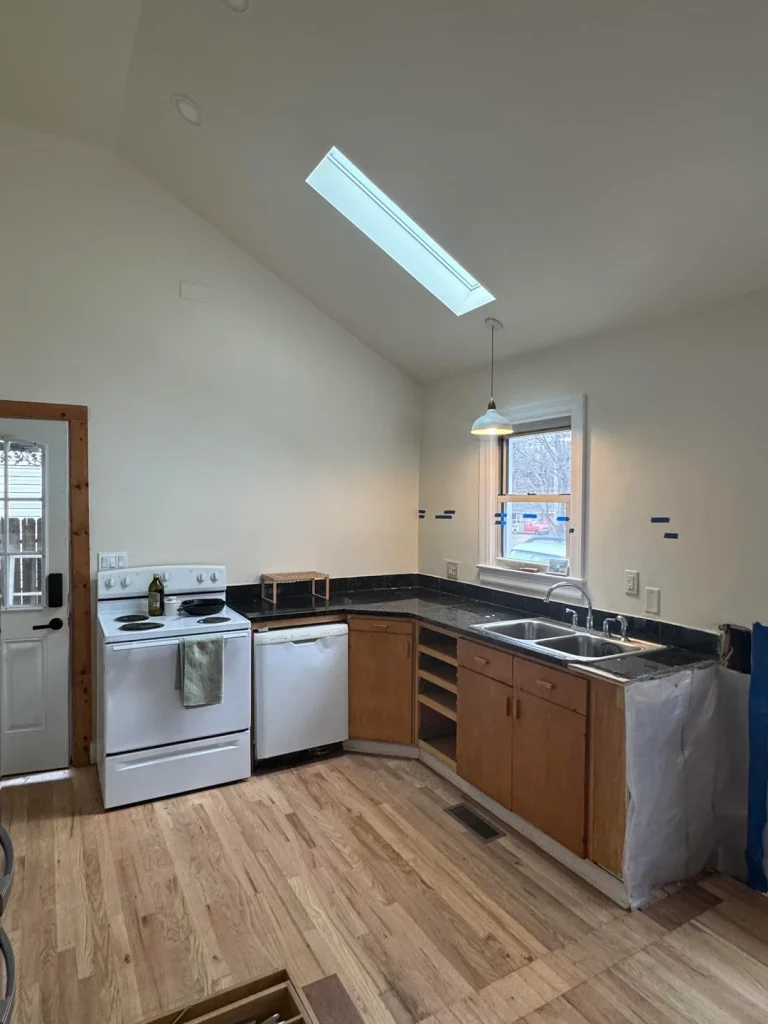
It shows what the space looked like when it was empty. It doesn’t look like much, but it was my blank canvas.
Note from the builder: Always double-check your measurements! If you are building cabinets that fit between other cabinets and a wall, being off by even a fraction of an inch can cause a huge problem.
Our Problem: Finding the Right Tools
I wanted to make solid red oak cabinets, which are super strong and look great. But, you can’t just cut solid oak wood with a regular handsaw. It requires serious tools, like table saws and shapers, to get everything perfect. Buying all these tools just for one project would cost tons of money more than buying new cabinets!
Tip for kids: Never use heavy-duty power tools without a grown-up’s help. Many tools require special training to use safely.
I didn’t have all these tools at my house, and I didn’t want to spend all my savings on tools I might only use once. What was I going to do?
Our Solution: The Community Workshop
Just when I thought my oak kitchen dream might be over, I discovered a hidden treasure: a community workshop. This is a big warehouse filled with amazing, huge tools that anyone can use if they become a member and learn how to use them safely.
This was the perfect solution! I paid a small fee, took some safety classes, and then I could use their huge saws, planer a tool that makes wood flat, and shapers which make cool designs on edges.
Building at the community workshop was awesome. There were other people there working on cool projects, and if I got stuck, I could ask for help. It was like a playground for builders.
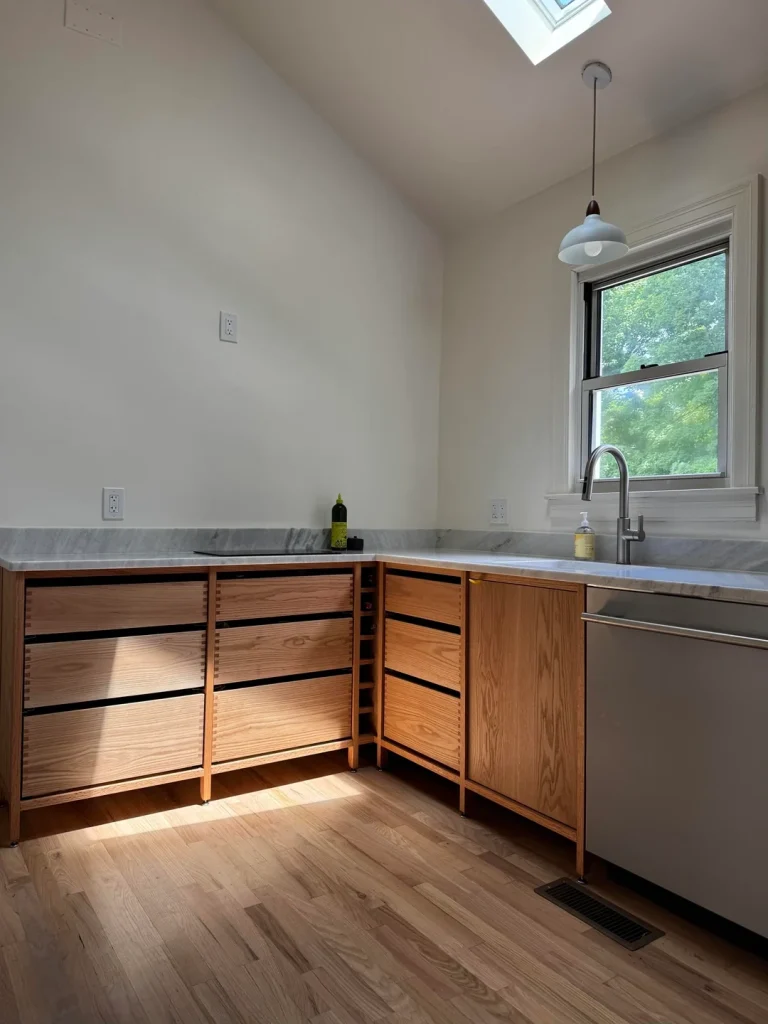
- You can see the final result of all that work in. See those beautiful wooden cabinets? I built every single one at that workshop! I even used solid oak for the frames and doors. For the parts you can’t see like the backs and bottom shelves, I used oak plywood, which is still very strong but costs less money and isn’t as heavy.
- Shortcut: Using plywood for the cabinet boxes and solid wood for the face frames and doors is a classic woodworking shortcut. It saves you money, makes the cabinets lighter, and keeps them looking great!
- Our Advice: How to Plan Your Kitchen
Looking at my finished kitchen, I am super happy. It’s strong, it fits the small space perfectly, and I did it myself! But no project is perfect.
Required Materials For Your Own Big Build
If you are thinking about building your own cabinets, here is a list of the types of things you’ll need. This isn’t everything, but it’s the main stuff:
Wood: This is the big one! I used solid red oak for the doors and frames. I used oak-faced plywood for the cabinet boxes. You can choose different woods, but make sure it’s strong.
A Plywood Sheet: You’ll need many sheets of plywood for the cabinet bodies. A standard sheet is 4 feet by 8 feet.
Cabinet Doors and Hinges: You can buy pre-made doors and hinges, which is a huge shortcut, or you can build your own like I did. If you build them, you’ll need specialized router bits to make the panel fit in the frame.
Cabinet Pulls or Knobs: These are the handles you use to open the doors and drawers. You can pick all sorts of styles!
Screws and Glue: You will use wood glue and special “cabinet screws” to hold everything together. They are much stronger than regular nails.
Stain or Paint: This is how you protect the wood and make it look the way you want. For oak, a clear finish or a light stain is beautiful.
Measuring Tape: Your best friend!
Clamps: You can never have enough clamps when you’re gluing wood together. They hold everything tight while the glue dries.
Tips and Shortcuts for Building
Building cabinets is a huge job, but these tips can make it a little easier:
Start with pre-made cabinets: If building everything from scratch seems too big, you can buy “stock” or “semi-custom” cabinet boxes and just make your own doors. It still feels like a DIY project, but it’s much faster.
Use a drill jig: When you are installing cabinet doors and hinges, a specialized plastic tool called a “jig” helps you drill the holes in the exact same place on every single door. This is a massive shortcut.
Label everything! As you cut pieces of wood for different cabinets the base cabinet, the wall cabinet, write on them with a pencil: “Base-Left Side,” “Wall-Right Side.” If you don’t, it turns into a giant wood puzzle.
Use wood filler: If you have a small gap in your corner where two pieces of wood meet, don’t sweat it. You can mix sawdust from your project with wood glue to make your own wood filler.
What Would I Do Differently Next Time?
I’m super proud of this kitchen, but even after doing it myself, I still have ideas for how to make the next kitchen better. Here is what I’m already planning for “Kitchen 2.0”:
A Wider Sink: My current double sink is nice, but I wish I had made it just a bit wider. Have you ever tried to wash a large lasagna pan in a small sink? It’s tough. A wider, single-bowl sink is my next dream.
Kick Panels Behind the Legs: You can see the little black legs that hold up the cabinets. While this looks neat, I realized that crumbs and pet toys always roll under there. A “kick panel” or “toe-kick” is a flat piece of wood that hides the legs and seals the space, so stuff doesn’t get trapped.
Backside Wall Shelf: you can see that there’s just an open wall behind where the cabinets go. You see I only put cabinets on the bottom. In my next kitchen, I’m going to add a simple, open shelf along that back wall to hold cookbooks, spice jars, and maybe a small plant.
FAQ: Frequently Asked Questions
How much money did you save by doing it yourself ?
This is a great question! Hiring someone to build custom solid oak cabinets for a kitchen can cost many thousands of dollars. By using a community workshop and building them myself, I saved tons of money on labor and tools. I spent money on wood, hardware, and my workshop membership, but it was still much cheaper than hiring a professional. Plus, I have the pride of knowing I built it myself! Think of how many ice cream sundaes you could buy with all that saved money!
Is solid oak heavy?
Yes, solid oak is very heavy. It’s a dense hardwood. The cabinets are very sturdy, but they were definitely difficult to move around. This is why using oak plywood for the cabinet bodies is such a common shortcut.
What are those little black legs for in ?
Look again at . Those legs are what I used to hold the base cabinets up off the ground. It’s a specific style of cabinet building that looks modern and makes it easy to clean under the cabinets. The drawback, as I mentioned, is that crumbs can get back there, which is why I’m planning kick panels next time!
Thank you for reading all about my solid red oak kitchen adventure! I hope this helps you feel inspired to build something great.
Please share this blog post with your friends who love building things, and don’t forget to subscribe to our blog! You’ll get more great DIY stories, tips, and build guides delivered right to you.